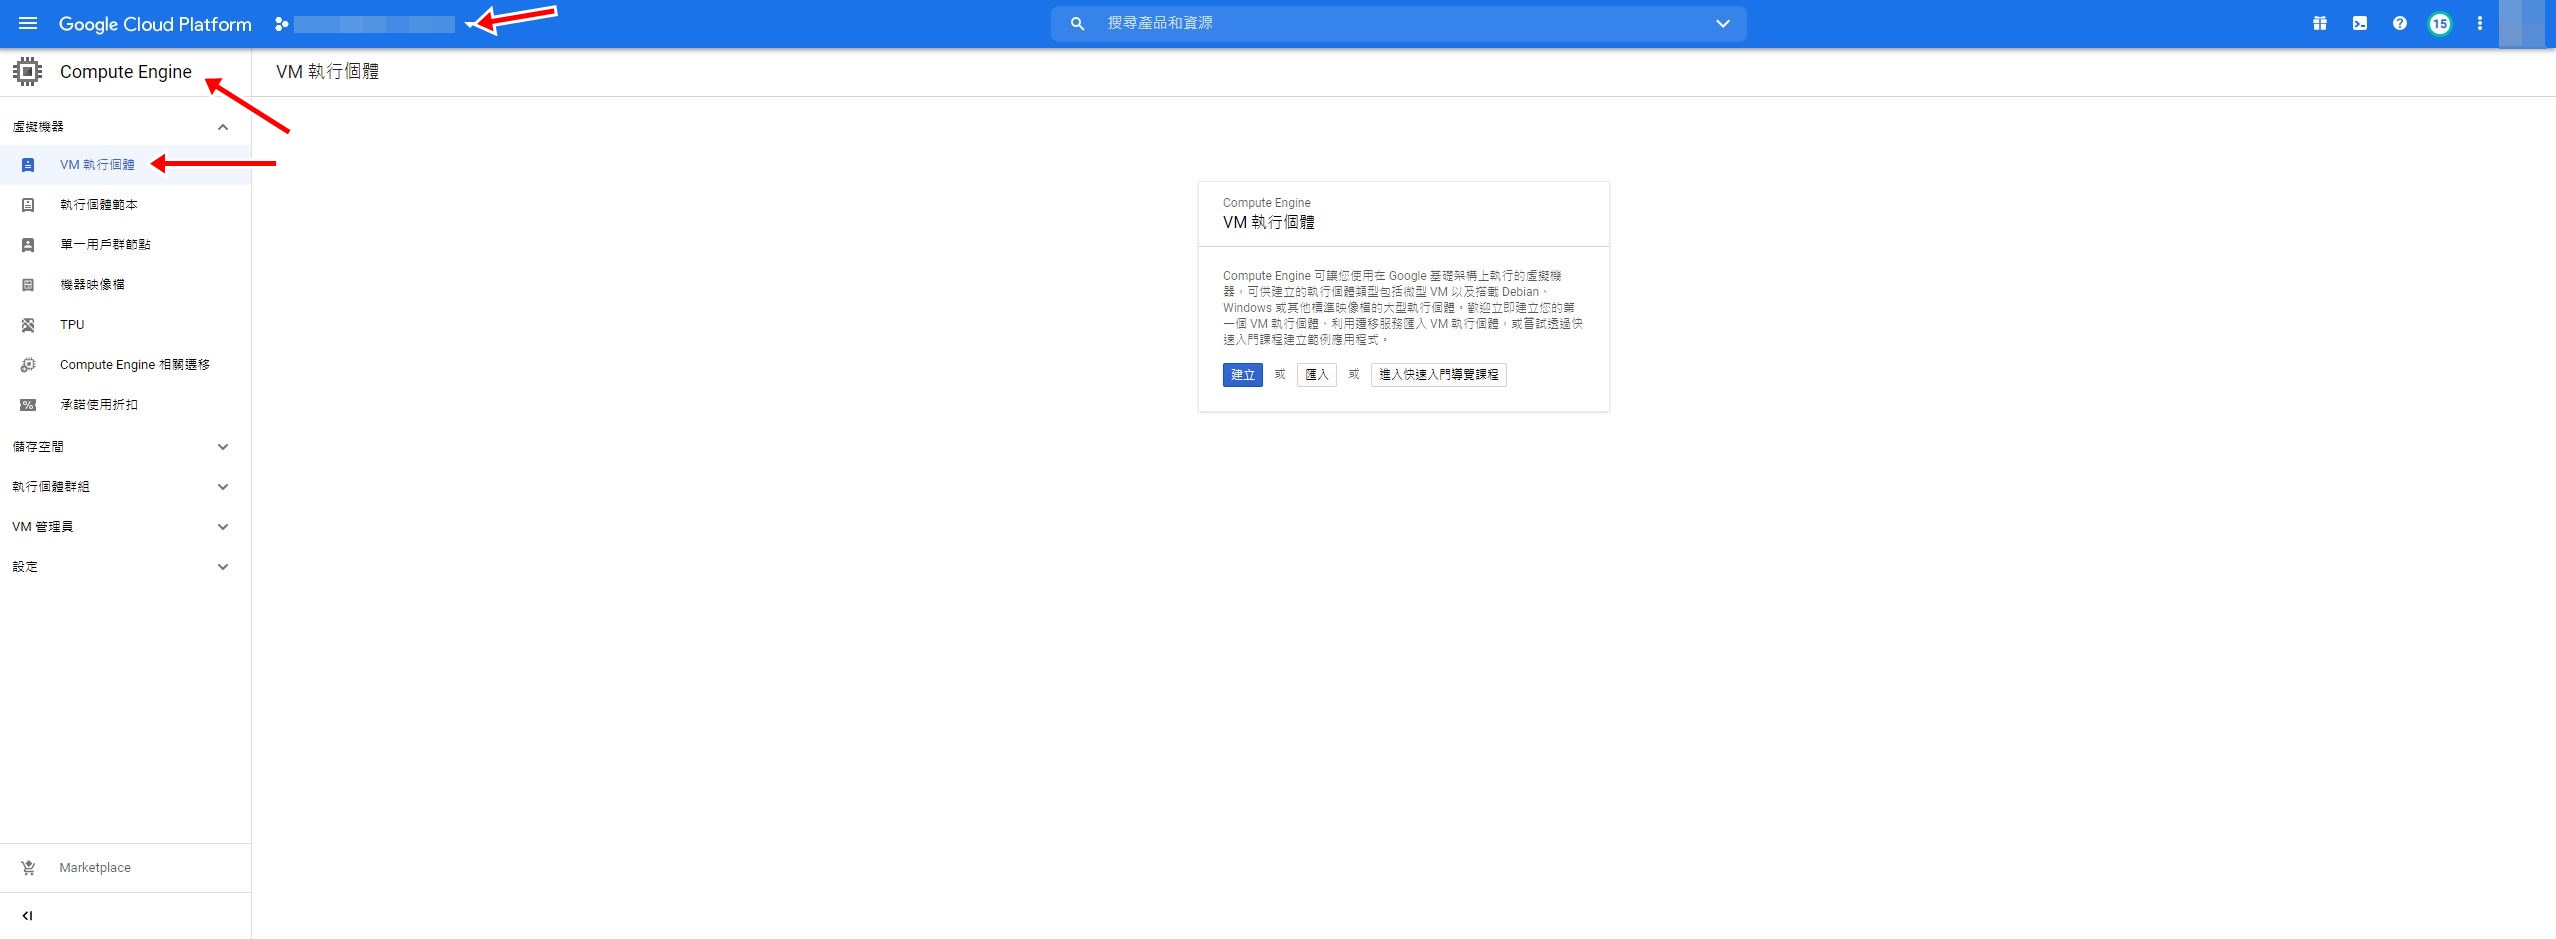
建立 Google Compute Engine 環境
建立 VM 執行個體
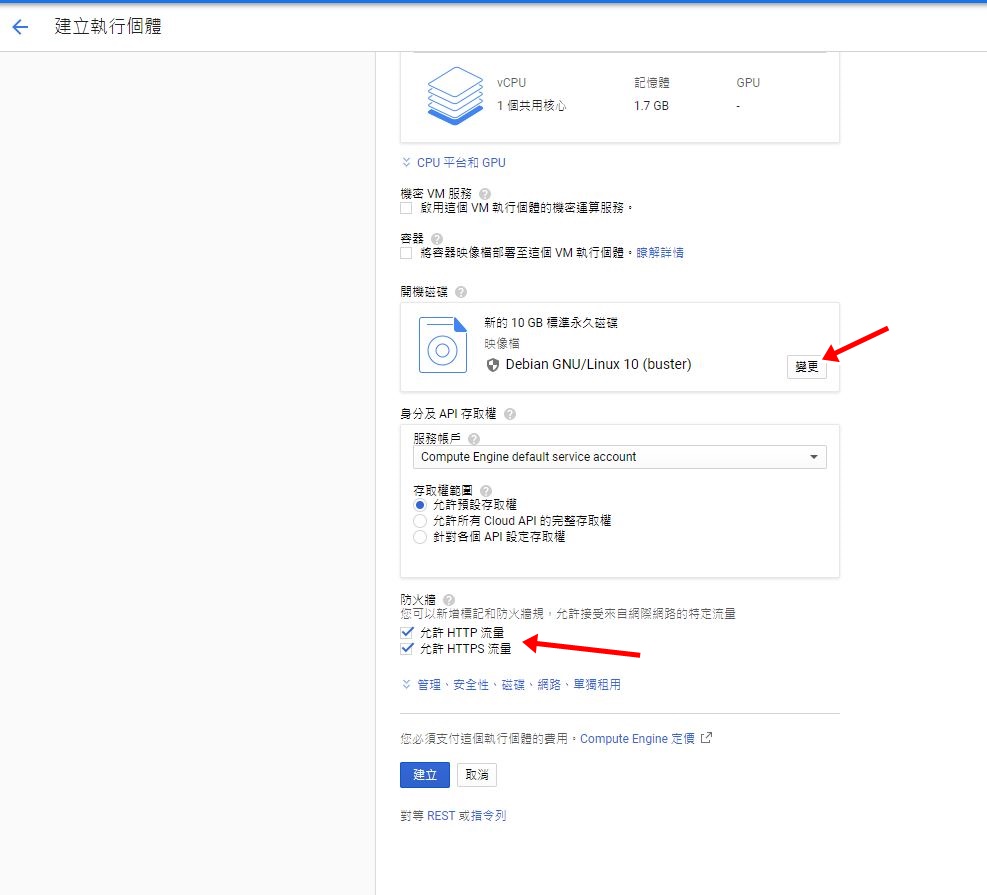
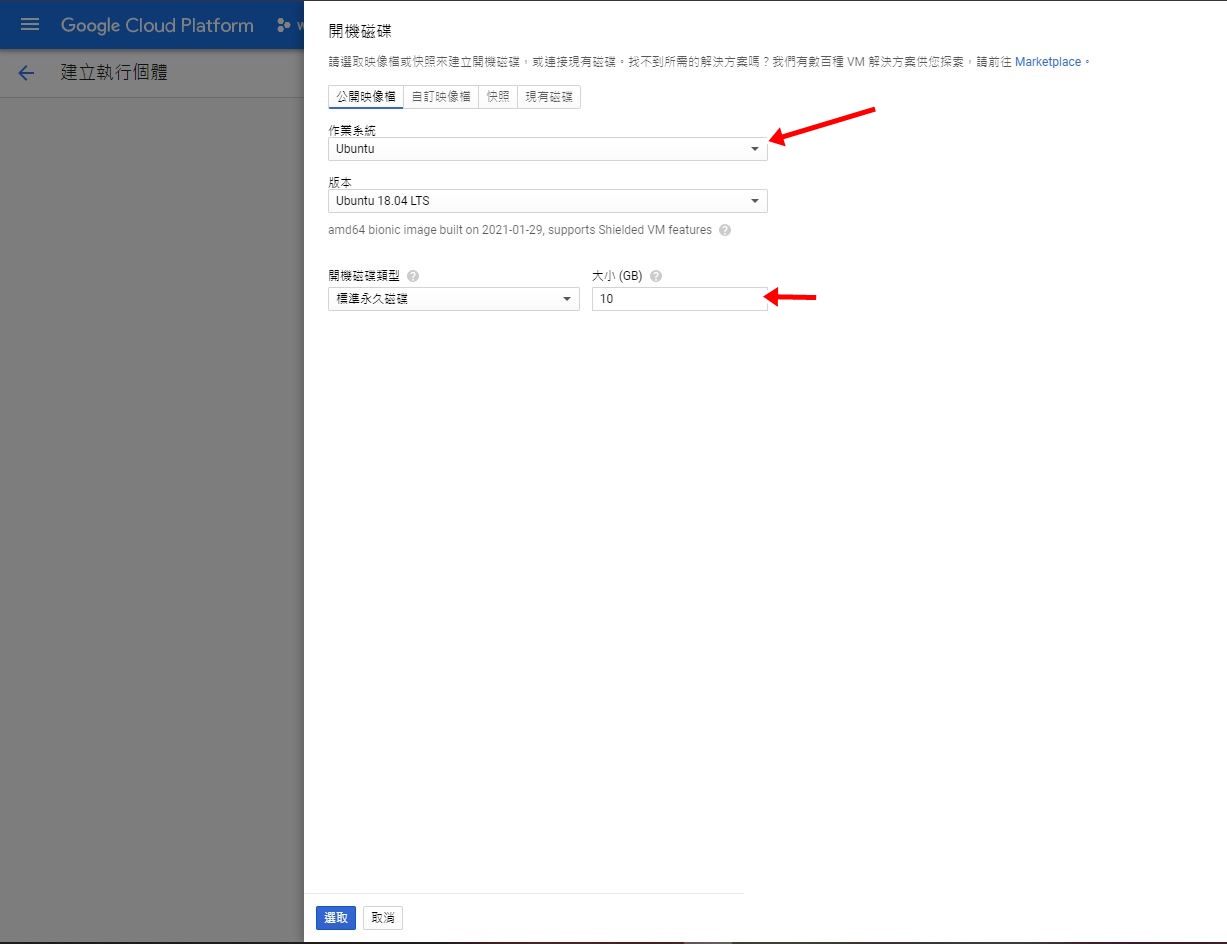
執行個體設定
需要設定cpu、ram以及這台虛擬主機的作業系統
請參考底下流程: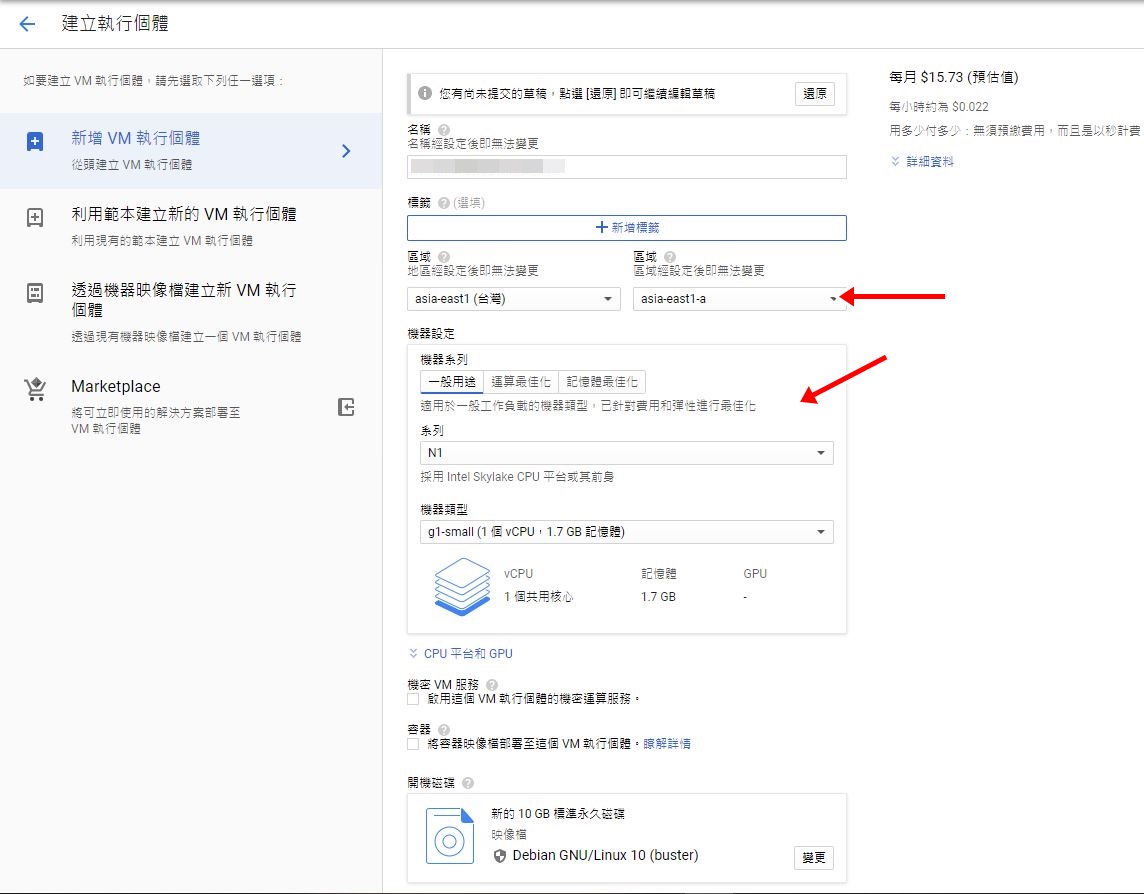
虛擬主機 linux 設定
選擇 在瀏覽器視窗中開啟,稍等一下後就會進入虛擬主機的 linux 介面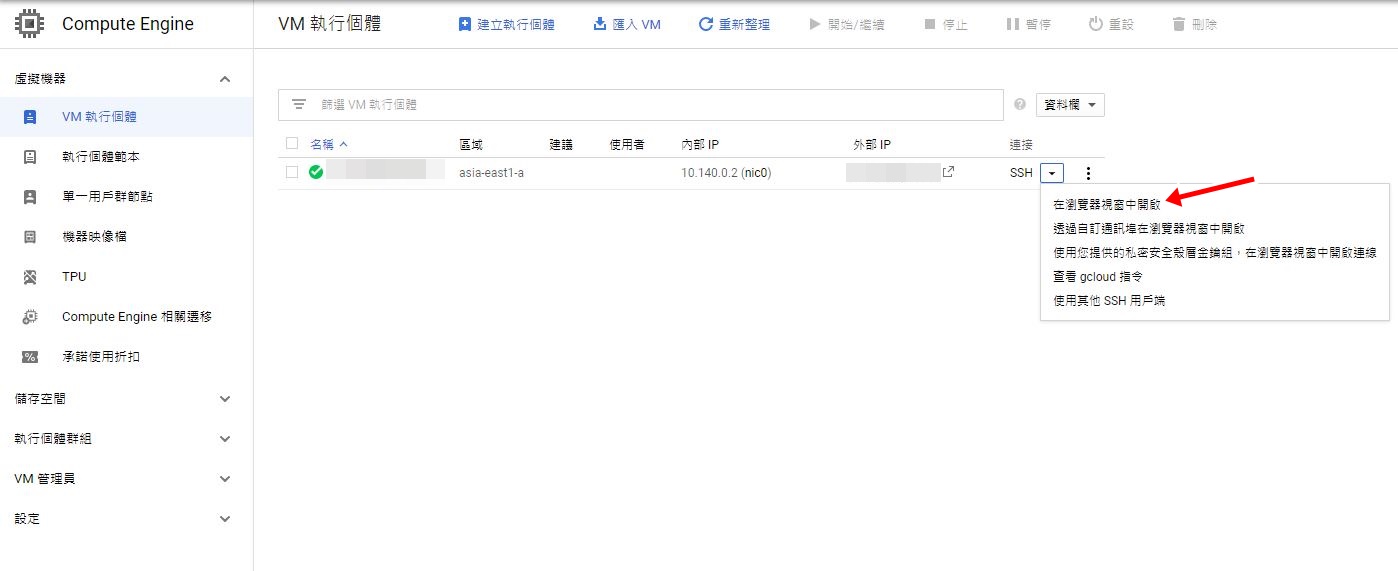
專案安裝 Nuxt 架站套件
需要先在本機端安裝 pm2、nuxt-start,
- pm2
直接在全域安裝即可
1 | npm install pm2 -g |
接著要初始化 pm2 執行文件
1 | pm2 init |
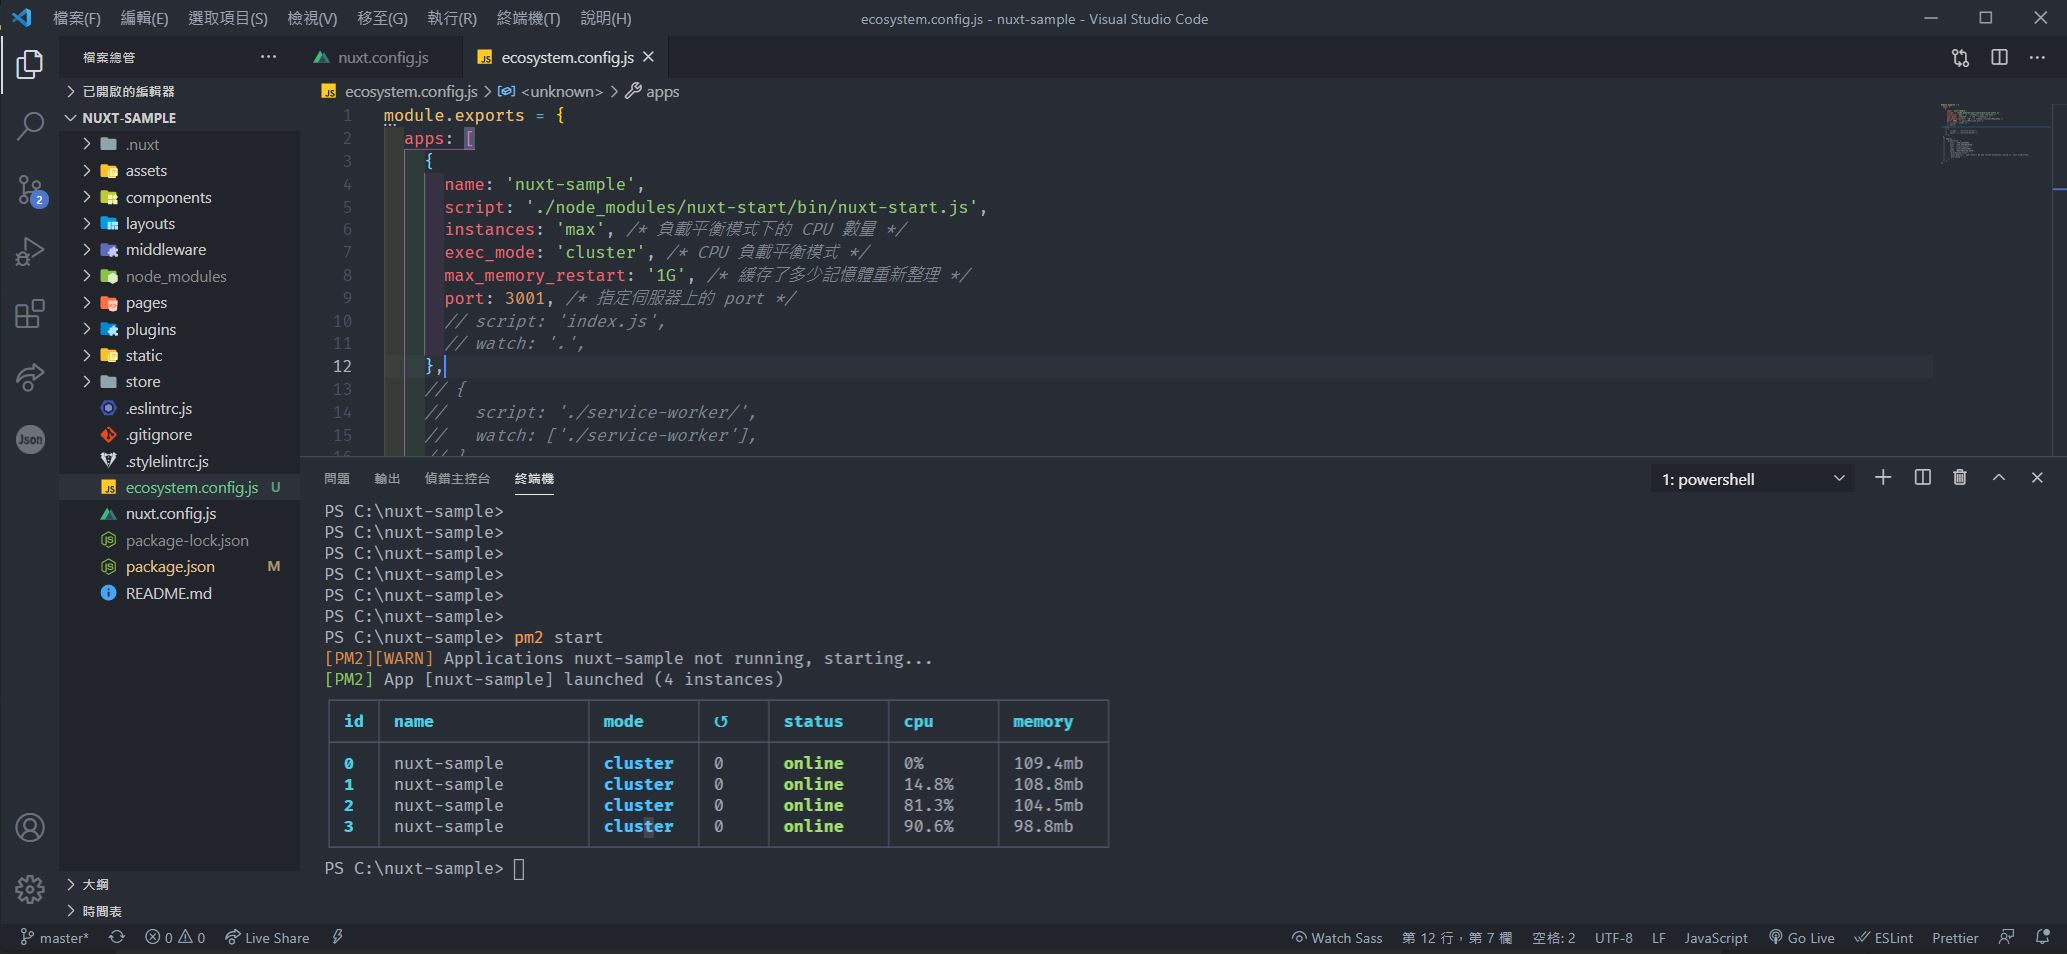
接著會產生 ecosystem.config.js 的文件,也會有預設的內容
不過可以先使用以下範例就好,其他先註解沒關係,因為都是在優化主機而已
1 | module.exports = { |
- nuxt-start
安裝在專案內
1 | npm install nuxt-start |
本機端測試生產環境
上面步驟設定完後執行以下指令,讓本機端當做一台伺服器開啟網站
1 | npm run build |
1 | pm2 start |
接著執行 http://localhost:3001/ 若有正確執行 nuxt 專案,代表已經在本機端測試成功
接下來就是要在 GCE 中也安裝這些內容,並執行 pm2 start
VM 安裝套件
首先進入到 vm 的 linux 介面,安裝 node.js、pm2、nginx、git
- 安裝 node.js
1 | wget -qO- https://raw.githubusercontent.com/nvm-sh/nvm/v0.37.2/install.sh | bash |
安裝與專案相同的 node 版本
1 | nvm install v10.15.0 |
- 安裝 pm2
1 | npm install -g pm2 |
- 安裝 git
先更新套件指令
1 | sudo apt update |
再執行安裝指令
1 | sudo apt install git |
- 安裝 nginx
先更新套件指令
1 | sudo apt update |
再執行安裝指令
1 | sudo apt install nginx |
linux 取得專案
使用 Git 將專案拉到虛擬主機上,接著就依序執行部署指令
1 | npm install |
沒出錯的話就表示已經在 vm 上執行成功
DNS 與 IP 設定
需要將 GCE 的 IP 改成靜態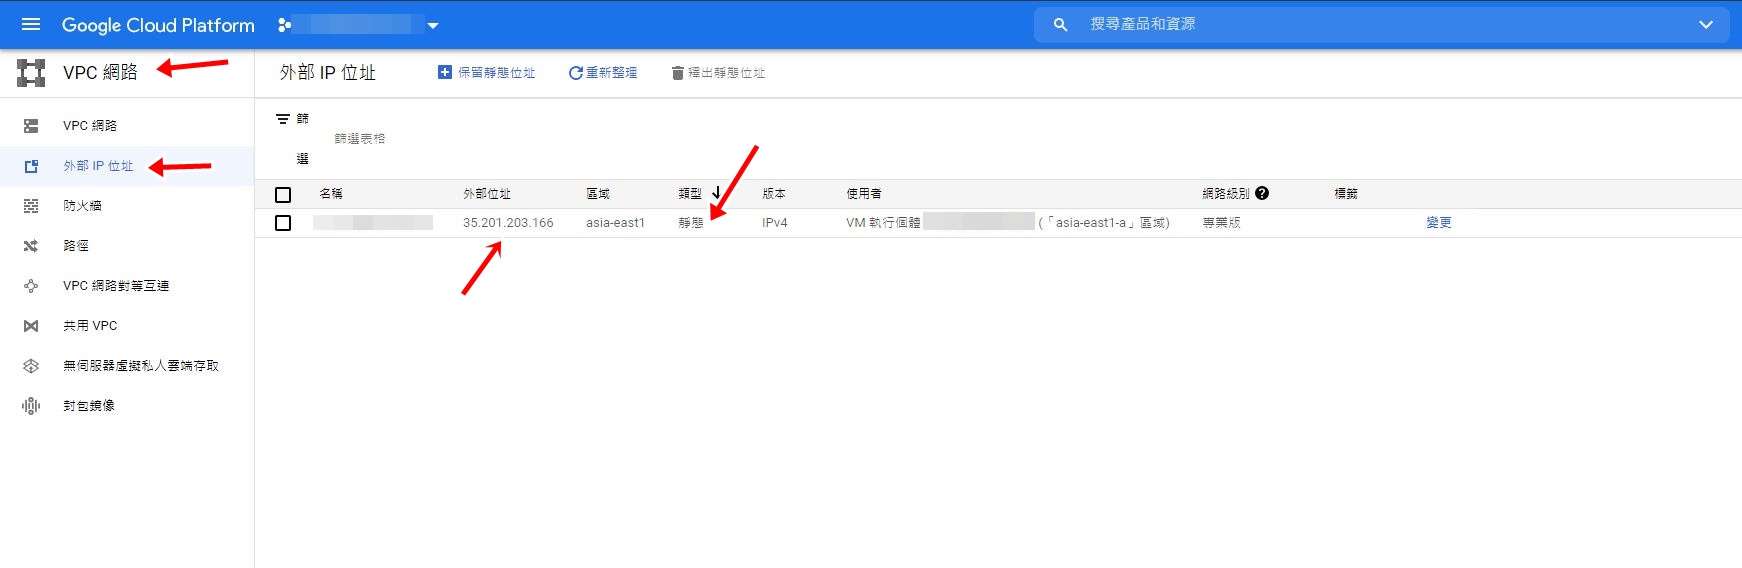
接著到網域註冊商將 DNS 指向 靜態IP,這部分可以直接請負責人員設定或是自己去買一個來玩玩
nginx 設定
在 linux 中輸入以下指令:
<註> yourdomain 請填寫是要使用的網域
1 | cd /etc/nginx |
執行完後會出現一個編輯器,複製以下範例即可
1 | server { |
接下來重新整理 nginx
1 | sudo nginx -s reload |
最後在本機上打開網址 yourdomain.com 應該就會看到 Nuxt 專案內容了。
Https 設定
使用 SSL For Free 服務,取得免費 SSL 憑證,憑證發行機構是 Let's Encrypt
另外,憑證每三個月會過期,需要取得新憑證
而 linux 透過 certbot 來自動更新憑證
安裝流程:
1 | sudo apt-get update |
手動完整部署流程
- 本地端開發 develop
- commit
- master merge develop
- 登入 linux 主機
- cd 專案
- git pull origin master
- npm run build
- pm2 reload id
執行上述步驟,Nuxt 專案就會更新完成囉。
指令整理
- pm2
1 | pm2 start // 啟動 pm2 → ecosystem.config.js |
- nginx
1 | sudo nginx // 啟動 nginx 伺服器 (預設裝好己啟動) |
參考資料
How to Install Git on Ubuntu 18.04
How To Install Nginx on Ubuntu 18.04
PM2 官網
5個提高Node.js應用性能的技巧
Using NGINX as a reverse proxy
letsencrypt
SSL For Free
certbot